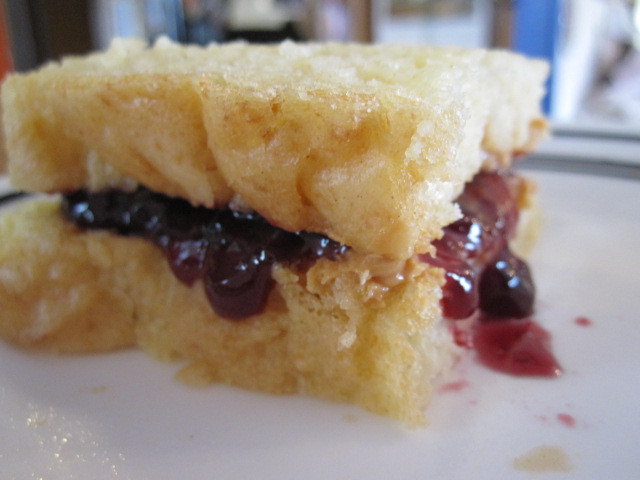
When our family had to go gluten free, all of our kids really missed bread. Our daughter Rhiannon was twelve years old at the time and she took it upon herself to start baking gluten free breads for the family. This recipe was a winner that we have been making ever since. 
This bread is dairy free and soy free as well. It’s easy to make and tastes every bit as good as any white bread you’ll find — with gluten or without.
While the recipe does call for a number of flours, these are flours that should be mainstays in a gluten free kitchen, as they taste much better than gluten-free products you can buy ready-made or make from most store-bought mixes — for a fraction of the cost. You can find gluten free flours and starches at natural food stores, in the natural or gluten-free sections of many grocery stores or through sites like Amazon and Thrive. Store them in the fridge or freezer to keep them fresh.
Best-ever gluten-free sandwich bread
3 cups gluten-free flour blend (recipe below) 
4 1/2 tsp (or 2 packages) active dry yeast
2 tsp xanthan gum
1 tsp salt
1 cup warm water
1/4 cup vegetable oil
2 eggs at room temperature
1 TBS honey
1 tsp cider vinegar
- Lightly grease a 9×5 loaf pan with nonstick cooking spray. A glass pan will work fine but a metal pan produces a browner, crisper crust.
- Combine 3 cups flour blend, yeast, xanthan gum, and salt in a large bowl.
- In a medium bowl, whisk together 1 cup of water and the oil, eggs, honey, and vinegar.
- Beat the wet ingredients into the dry ingredients with an electric mixer at low speed until the batter is smooth, shiny, and thick. Beat at medium-high speed for 5 minutes, scraping the bowl occasionally.
- Spoon the batter into the prepared pan and smooth it flat. Let it rise in a warm place for 30 minutes. We use a warmed oven that has been turned off.
- Remove the pan from the oven and let rest, covered with a clean towel while preheating the oven to 375F.
- Bake for 30-35 minutes or until the bread sounds hollow when tapped and the internal temperature is 200F. Make sure it stays in the oven until it’s nice and golden brown or the loaf will collapse in the middle.
- Remove it from the pan and cool it on a wire rack for at least 10 minutes before cutting.
Adapted from a recipe in The Gluten-Free Bible.
Gluten-free flour blend (from The Gluten-Free Bible)
1 cup brown rice flour
1 cup sorghum flour
1 cup tapioca flour
1 cup corn starch
3/4 cup millet or chickpea flour
1/3 cup instant plain mashed potato flakes
Whisk it all together and store it in the refrigerator.
***
Where to find the best prices on gluten free flours:
We buy our GF flours from a variety of sources, most often Azure Standard and Amazon. I especially like buying Bob’s Red Mill flours and grains on Amazon. They come in three- or four-packs for an inexpensive price. Store them in the freezer to keep them fresh, since some grains have shorter shelf lives at room temperature.
Since we have a large family and I cook a lot of GF products from scratch, I also invested in a Vitamix and a grain mill attachment and grind my own flours. We keep jars of brown rice and white rice in the cool basement (to keep them fresh longer) and use them for cooking and also for making our own brown rice flour and white rice flour, for instance. I also buy sorghum, amaranth, quinoa and other grains in bulk and store them in the freezer to grind into flours as needed. They are far more nutritious than rice flours and can really add to the taste and texture, so it’s a way to make your GF foods much healthier and better tasting. Some of these grains are rather expensive as flours but much more affordable if you buy them as whole grains and grind them as needed. You can do the same with seeds like millet, beans like dried garbanzo beans, and nuts like almonds for almond flour (note that without the grain container attachment, things like almonds become almond butter and not almond flour). This is a far more affordable option in the long run for large families or families who do a lot of cooking (or selling items at the farmers’ market or other venues), but it’s probably not cost effective for families of one or two who don’t do a lot of gluten free cooking from scratch.
A Vitamix is a worthwhile expense in my book, though, since it is such a workhorse in the kitchen for so many jobs and lasts so well for so long. Ours is over five years old and sometimes is used once or twice a day for things like smoothies, soups, nut butters, hummus and so on. It holds up to blending ice cubes, frozen fruit, nuts into nut butter and more, and the two times that it has needed repair the company has quickly taken care of that at their expense. I highly recommend a Vitamix as a “buy it once” item for your house or homestead. We bought ours reconditioned on Amazon, which saved us between $100 and $200 but still got us the full 5-year warranty. I purchased the grain mill attachment about a year later and we use it several times a week. Our son Jack usually grinds the flours for me as needed and it takes him less than a minute for most fresh, gluten free flours.
If you do not do much gluten free cooking at all, you can find these flours at most grocery stores in the natural foods section. Bob’s Red Mill flours like sorghum, millet and brown rice flour tend to be just a few dollars. Again, keep them in the fridge or freezer to keep them freshest. If you do get to the point where you’re even baking fresh GF bread once a week, though, I recommend purchasing in larger quantities through sites like Amazon for the most frugal options.
Gluten free breads can be super affordable if you make them at home this way (and taste so much better than the store bought stuff!).
*** Note that these are affiliate links. If you purchase products (these or any others) through these links, we receive a small commission at no cost to you. I would never recommend a product on Amazon here that I wouldn’t recommend to a friend. If you do decide to purchase on Amazon and go through our links, it’s a nice way to support our site. Thanks!
