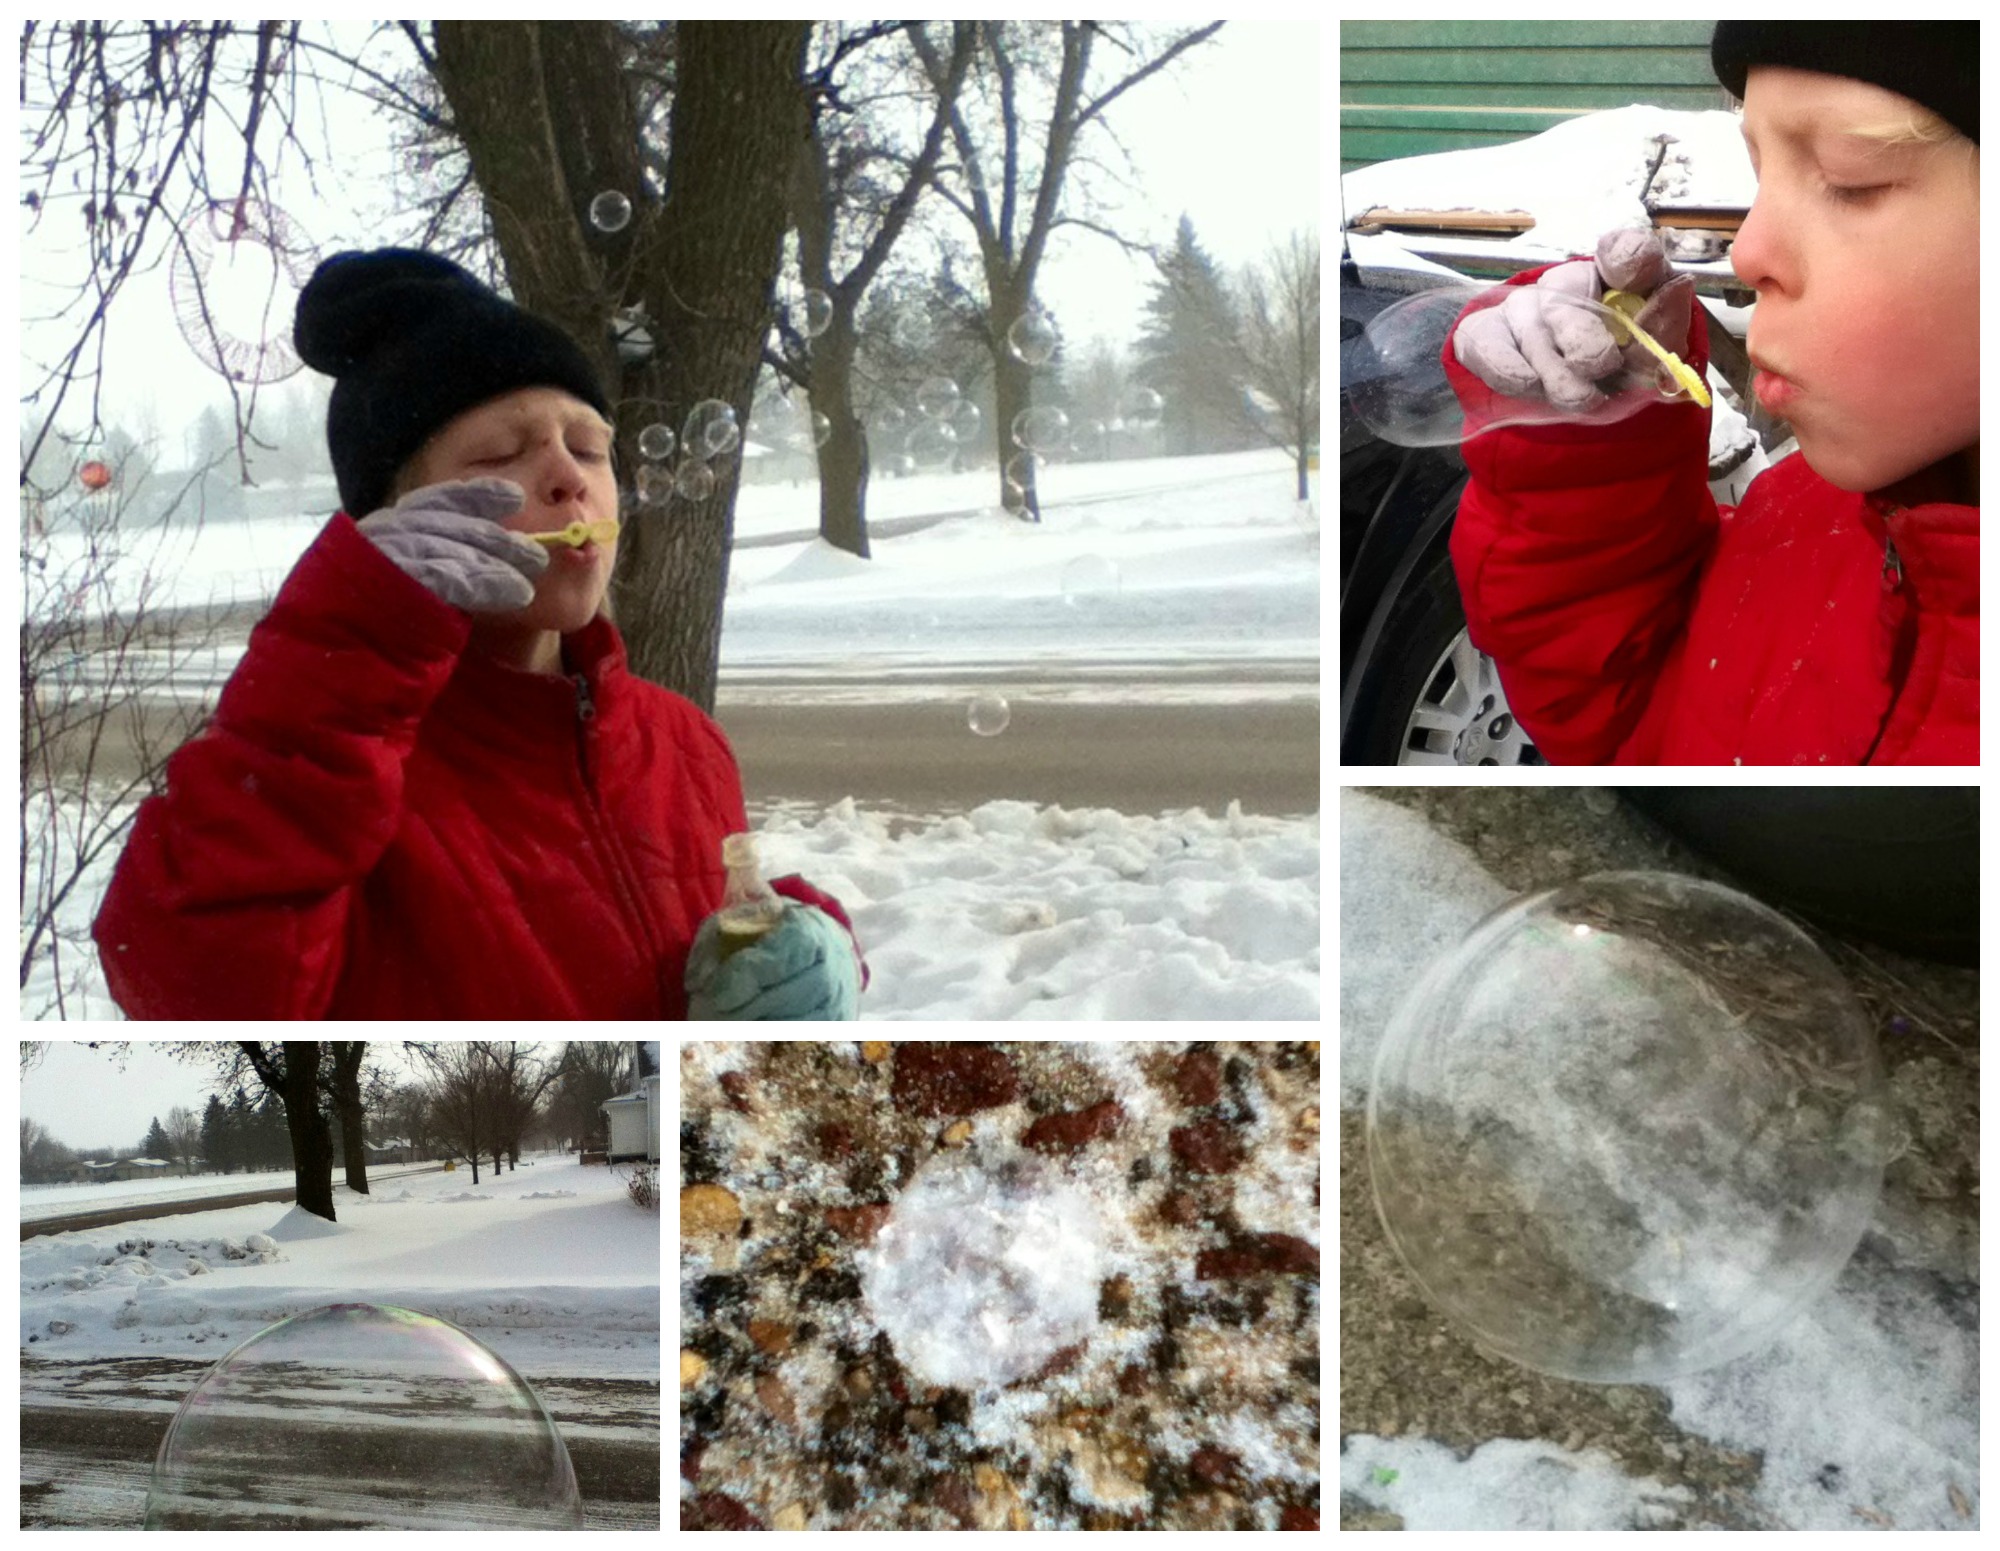
It gets bitterly cold here in Minnesota and in much of the United States in the winter, making it an ideal time to do winter science experiments like freezing bubbles outside. This is a fun and easy project that can teach kids a lot of science concepts.

Kids in warm climates can try it, too — in the kitchen freezer.
Bubbles will freeze any time it’s below freezing, but it won’t work well unless it’s pretty far below freezing. This experiment works best below 12 degrees Fahrenheit (about minus 11 C). Since the bubbles take some time to freeze, the warmer it is the longer it will take to freeze them.
Just gather up some bubble wands and bubble solution, and dress the kids warmly. You may want to bring a camera, too, to capture some of the images. It’s best to pick a location that’s somewhat sheltered from the wind, as the bubbles are likely to quickly float away on the wind, making them harder to observe.
Carefully blow a large bubble and catch it on the end of the wand. Watch as it slowly forms crystals and freezes. Also blow some bubbles up into the air, as high as you can so they have a lot of time to freeze before they land. Watch how they react as they float, hit objects such as branches, and land on the ground. Typically, they will not react the way normal soap bubbles do at all.
You can use commercial bubble solution or homemade, and people have reported that both work about equally well. Obviously, a better quality solution will have a better chance of holding up long enough to see results.
Kids will notice that the bubbles begin to form crystals as they freeze. They also will break or collapse instead of popping, often leaving crumpled pieces that look like cellophane or flimsy pieces of bubbles that float through the air. Some will rip on tree branches and float away like tiny deflated balloons, instead of just disappearing as they pop the way regular bubbles do. Sometimes half a bubble will remain like a jagged cup.
You can also do this experiment if you’re in a warmer climate. If you’re not in a cold climate, Home Science Tools has instructions on how to blow bubbles and then freeze them in your freezer, with photos. They advise blowing a large bubble carefully onto a plate and then putting it in the freezer for 5-8 minutes, then checking to see if it’s frozen. You’ll need to check often, as it will pop soon after freezing. They say:
Once the bubble is frozen, carefully remove it from the freezer and set it on the counter. Depending on the temperature of your freezer and the temperature of your kitchen, the bubble may form a hole and collapse almost as soon as you remove it from the freezer. That’s okay—you can still check out the ice crystals on the plate and the wisps of the frozen bubble that remain! Use a magnifying glass to examine the ice crystals more closely.
It’s important to talk about the science behind what’s going on. Many science sites and blogs post beautiful pictures of frozen bubbles but don’t explain what’s happening. Share it! Science News has a great post about the crystals formed on frozen bubbles and frosted windows. They explain:
Ice crystals, the repeating pattern of ice molecules, are the basis of beautiful snowflakes and frosty windows. Window frost grows when the glass is exposed to freezing temperatures on one side and warmer, moist air on the other.
The bubble solution is made up mostly of water, which begins to freeze in the very cold temperatures. Explaining Science further says:
The water in the bubble solution freezes into crystals, appearing on the surface and inside the bubble solution. Study the photo carefully until you begin to see a crystal pattern on the outside of the bubble. Crystals are a special type of solid material where molecules fit in a repeated pattern, creating many kinds of unique shapes. They form in nature when liquids cool and begin to harden. A common example of a crystal is a snowflake.
Also talk about why the bubbles react differently when they pop. Ask kids why they think the pieces of the bubbles remain and behave so differently. Discuss how they think freezing may have influenced this.
For more on the science of bubbles, see Why Do Bubbles Burst?, Bubbles Science Projects and the Science Behind Bubbles.
Have fun!


One thought on “The science of frozen bubbles and how to make them in cold climates or warm”-
Fresh Homeschool Starts | Magic and Mayhem
(January 1, 2018 - 11:21 am)[…] there — though this weather is good for the occasional quick outdoor science experiment like freezing bubbles and vaporizing hot water to make instant […]